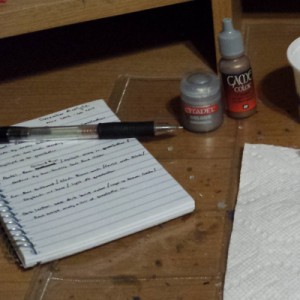
Between a sluggish painting speed and the occasional hiatus I’ve occasionally found myself at a loss when trying to remember how I painted older models. I can usually remember the technique I used but don’t always recall specifics like paint mixing ratios. Late last year I finally decided it might be a good time to start keeping a basic painting journal. There’s a number of electronic options out there, from Google Docs to a wiki (either personal hosted wiki or on a stick). At some point I’ll probably transfer most of my notes over to some sort of taggable or sortable format but for now I’ve found it most convenient to keep a small notebook and pen next to my painting area so I can jot down notes or paint recipes as needed.
Recently I’ve been experimenting with a few of the techniques that the Privateer Press painting staff talk about in their recent books. It’s taken a while to adapt to a new way of doing things but after getting used to it I’ve been able to increase the speed I can paint a figure pretty significantly.
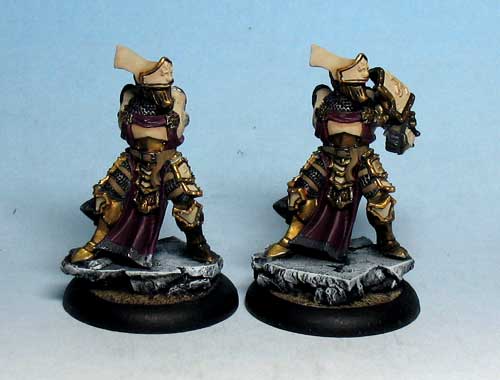
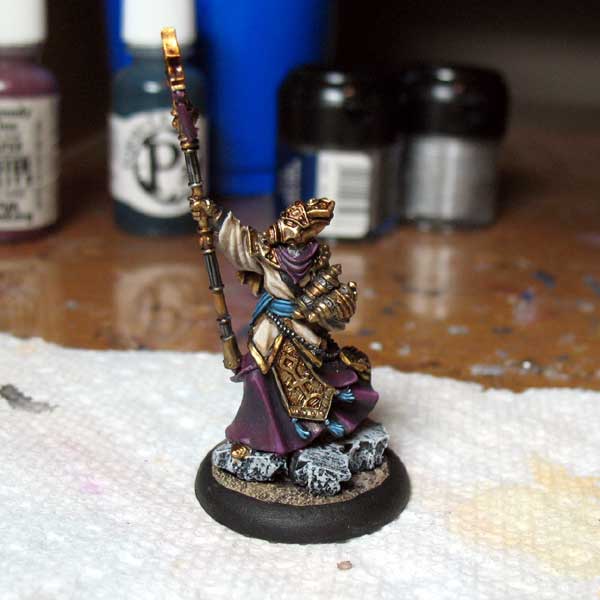
Vice Scrutator Vindictus
The biggest change I’ve picked up on is how I layer cloth. In the past I’ve started with the darkest shadow color and slowly worked up from there layer by layer. But recently I’ve switched to basecoating with my mid-tone and shading down from that in thin coats, falling back to wet blending occasionally just to smooth out some of the larger surfaces.
Vindictus in particular only took a few days for me to do, and for me that’s faster than it usually would. If it weren’t for the filigree around the armor plates, I expect it would’ve gone even faster.
I’ve also spent some time on a reaper figure lately, using this technique primarily on her cloak. A lot of the rest of her is quick-work, but all in all, she’ll make a good RPG figure once complete.
Reaper Miniatures #2834 Deladrin, Female Assassin
I’m still refining the techniques, but for now I’m satisfied with how the figures are turning out. Soon I’ll be moving on from my recent string of Protectorate pieces to try out the wintery blues of my Legion. Between that and a few side pieces I’m working on, I should have ample opportunity to perfect the new technique.
To help keep motivated after spending a fair bit of time on my exemplars’ armor, I switched up things a bit and started working on some side projects. I found a couple Hordes figures I had started to work on and forgotten about, and started work on some figures for a new RPG campaign.
The change of pace has helped me keep productive, but the subject matter isn’t really helping the problem I mentioned previously of not pushing my skill. It seems like a lot of my RPG figures tend to get rush jobs – especially the plastic ones. But at least it’s still painting; I’m building momentum. 🙂
The first couple miniatures are the Unit Attachment for the Blighted Swordsmen of the Legion of Everblight. They’ve been sitting on my desk in an almost-complete state for ages but I finally got back to working on them the other day. I’m down to the last few final details and I’ll be able to seal them.
The black-robed figure is a speed paint job for an RPG character. It’s an old plastic Games Workshop wizard figure I got years ago. He’s pretty basic (and way too rosy cheeked at the moment) but makes a good pompous little wizard.
The last figure is one that I’ve actually painted before, but I’ve gone back and rebased. I’m thinking on starting to do this on more of my figures as I get time. Since their tabs are already glued into the base it’s just a quick series of tasks:
Paint watered-down PVA glue on the base
Dip the base in sand
Paint watered-down glue over sand
Paint
Seal
Add static grass
It’s something that should be easily done while I’m waiting for other other figures to dry, and will help make some of my older figures look more ‘finished’. They never see table time other than in role-playing games where it doesn’t really matter, but I’ll be happier with them.
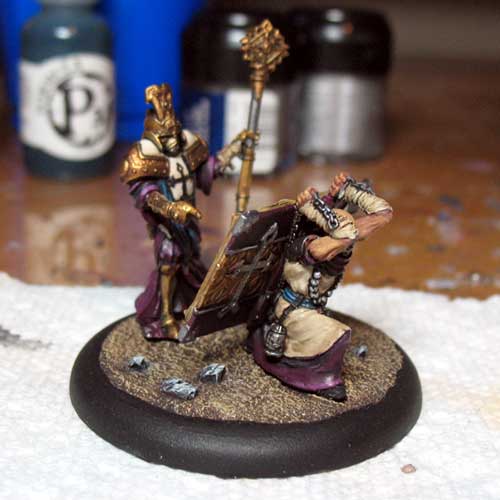
I’ve noted a few things before on my blog: I hate painting Exemplar and I’m suffering from brush burnout. You’d think I’d pick different a different model type for my newest project. But alas, I just started my Exemplar Errant Seneschals and Unit Attachment instead. Sometimes I wonder if something’s seriously wrong with me.
I spent a few evenings with Hulu on the laptop near my painting desk working on the models’ armor and made some decent progress. I’m still working on some more detailed shading at the moment, but I’m going back and forth between wanting to take the time to do some really detailed shading and getting burnt out working on them.
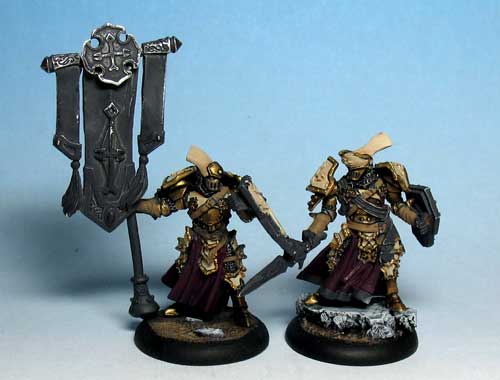
Knights Exemplar Errant Seneschals
Knights Exemplar Errant Unit Attachment
This has me thinking – I wonder if army painting is causing my abilities to stagnate. It seems like there’s less motivation to push my skill to the next step when in the back of my head I can always fall back to “Well, this just has to look as good as the rest of my models.” Might be time to shake things up a bit.
With just a couple days left before Privateer Press Weekend at DieCon X here in St. Louis, I’m still scrambling to finish a few last minute figures before Saturday’s Hardcore event. Surprise surprise, it’s down to the wire with me scrambling to finish a everything up in time. It really shouldn’t be a surprise, though. 🙂
I also have to clean up a few models and finish assembling my Exemplar Errant Seneschals in case I want to use them later in the weekend. They definitely won’t be painted for Hardcore but I might toss ’em in another list to give them a go in one of the other formats.
Despite being behind, I’m looking forward to the event. Last two years have been fantastic, and this year promises to be no exception.
In a previous post I mentioned that I use concrete patch as a basing material. It’s an alternative to sand that’s a rock solid way to model dirt to-scale on a base. It requires a bit more effort than the traditional glue and sand but I think the end result is worth the extra work.
Base WIPs
The most difficult aspect of working with the concrete patch is that in order to attach models, you have to clip the pewter tab from the base of the figure, give it a quick filing, and pin it to the base. I’ve always preferred that method anyway, so it’s no big deal. But if you’re used to just gluing and slotting the figure, then switching to concrete patch is going to involve some extra steps.
Usually I’ll glue the pin to the miniature and drill a hole on the base, cover the base in concrete patch, and before it sets, press the miniature down where it’ll ultimately stand, and remove it. Once the concrete patch dries, the indentions left by the miniatures feet will cup them in place securely.
If you want add accessories to a base – things like small rocks, gears, or the like – the patch itself will hold them in place if you press them in before it dries. For the most part this has been all I’ll need to do, but occasionally if a piece is loose I’ll pop it up after the patch dries and glue it back down into the same divot, making it very secure. For tiny rocks made from cork I’ll just put a drop of glue over it while attached, and that is usually sufficient. I prefer superglue over craft glue for these steps.
As for painting my bases, I picked up a recipe for craft colors a few years ago that I use for all of my bases. I can’t remember the source anymore, but the combination works great. One note though, before going into painting – make sure you have an extra old brush. Drybrushing over concrete patch will ruin a brush like nothing else.I use craft paints for my bases because frankly there’s no point in wasting expensive model paints on them. Once they’re thinned slightly, they dry brush on adequately for any base and are far cheaper than higher quality alternatives. I purchased a set of 2oz. bottles of paints over two years go just for basing and I still have plenty left.
Basing Paint Range
The recipe is pretty basic. Just lay down a solid layer of Burnt Umber (or Dark Burnt Umber) and drybrush with successive layers of:
Brown Oxide
Autmn Brown
Golden Brown
Maple Sugar
If I feel I need a final layer of highlights, I’ll add a little Satin Cream to the Maple Sugar for just the lightest of dustings.
You could easily get away with buying less bottles of paint and mixing up midtones, but I don’t think it’s worth the time. Each bottle is less than $1 US, so for $5 you can buy enough shades to be able to work straight from the bottle – no wasting time mixing midtones or trying to match previous results.
After you paint the bare earth, you can add flocking and/or paint whatever additional accessories you’re adding to your base. It’s nothing fancy, but it gets the job done.
It’s already that time of year again. In a few short weeks Privateer Press Weekend at DieCon X will be upon us. This year the event will feature another Hardcore event again – the first ever official one for Warmachine MkII. There’s not much time left, but I’m behind on getting prepared. This feels oddly familiar.
I have a few lists I’m tossing around to play, but I haven’t even really settled on if I’m playing the Protectorate or Legion. The Legion models I’d want to use are already painted, but there’s still a few key Protectorate ones – like the Hierophant and Covenant – that I needed to get to.
It’s been a while since I last picked up the brush; maybe even a couple months. Painting has always been an enjoyable hobby for me, but lately it’s always seemed like there’s something else I rather do with my free time. Still there aren’t many chances to play in a Hardcore event, so it’s time to buckle down and get to work.
Lately I’ve been neglecting my painting table – cheating on my models with a different craftform. I put down the pewter in exchange for styrofoam and traded in my paint for some spackle. With a little advice from Ulf of Dice-Speak and Game Fusion Studio, I’ve made an initial foray into the realm of terrain making.
A few initial attempts at hills (and Niska’s Skyplex on TV)
I’ve been painting models for years now but I hadn’t really spent any time on the terrain side of the hobby – there’s always been terrain to play on locally and I preferred painting models to fabricating scenery.
Sites like TerraGenesis have taught me the basics of terrain making but I didn’t have any real hands on experience. But over the course of a few nights with a hot wire foam cutter I put together some basic hills. Nothing major – and still in need of some greenery – but after I was happy with the results I decided to move up to something else I’ve been wanting to build for a while now.
I had a request as a comment on a previous article to talk about some basic brush care tips. I’m no expert on the topic but I’ve ruined more than enough brushes to know there are a few traps to avoid in order to keep your brushes in working condition as long as you can.
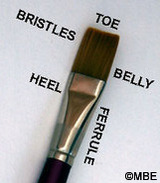
Keep the Ferrule Clean
Anatomy of a Brush
The ferrule of the brush is where the bristles are glued together and held to the handle. If paint is allowed to work its way up into this area of the brush and dry, it will start pushing bristles outward and causing the tip to start losing its shape. It’s best not to dunk a brush completely in your paint when loading it up for this reason. Overloading a brush makes it harder to control the paint to begin with, but by keeping the paint limited to the tip of the brush you’ll also help keep the ferrule clean.
Clean & Condition your Brushes
Once every so often you should clean and use use brush soap (I use this) to help keep your brushes in shape. I use the soap to clean the bristles, then reshape the brushes, coat them in the conditioning soap, and let them sit overnight to condition. This process will help remove any paint from between bristles and even the occasional bit that escapes up into the ferrule as well as replace some of the oils in natural bristle brushes.
Keep the Bristles Shaped
Detail work requires a steady hand and a sharp brush. While the former can only be developed by practice, the later can be quickly lost if you don’t take care of your brush. In addition to the tips above, make sure you don’t abuse your brush when painting with it. Specifically, stippling or stabbing at a miniature with a brush is going to be a good way to ruin the tip. Drybrushing is really hard on brushes as well. That’s why most painters keep old brushes around to do their drybrushing with. I’ll occasionally run a brush perpendicular to a surface to do something like highlighting the edge of an armored plate, but for the most part make sure you’re painting by dragging the bristles along the surface without torquing them in an odd direction.
Don’t Drown Your Brush
When you store your brushes, store them either with horizontally or vertically with the bristles in the air. Never store brushes tip down. Likewise, don’t leave a brush to soak in water or cleaner bristles down either – this will mash the tip and if you leave it in long enough, start to dissolve the glue in the ferrule.
Brush Caps aren’t Trash
Most decent quality brushes you’ll buy will come with plastic sleeves that slip over the bristles. Don’t throw these away – they do a great job protecting a brush during storage or transport. If a brush is covered with one of these caps, the bristles won’t bend or become misshapen as it bounces around in a drawer, bag, or wherever you’re keeping your supplies. Even if you use a pretty safe storage device where accidents aren’t likely, it’s better to be safe than sorry.
Those are a few of the things I’ve picked up the past few years. If anyone has any other tips for painters regarding brush care and/or use, please share!
When I upgraded my brushes to Winsor & Newton Series 7‘s a few years ago, I started paying more attention to brush care. With the brushes’ higher cost, I wanted to get as much life out of them as possible. For me that meant keeping an older brush around to do my painting dirty work.
Before I started using the S7’s, I was pretty rough with my brushes. I was guilty of all of the brush sins, including things like stabbing at models sometimes with the brush and letting paint get into the ferrule regularly. While this wasn’t a big deal when I was spending a buck a brush, I knew I had to change my habits with the new brushes, but doing so would slow me down. Lets face it – when you’re base coating, dry brushing, or otherwise just trying to lay paint down quickly, doing things right takes more time.
That’s when I started going to the bargain brushes at my local art store. They’re nowhere near the quality of S7’s, but they have one distinct advantage: the el cheapo factor. For a few bucks I could pick up a couple flats for drybrushing and a few rounds for base coating work (especially for my bases; concrete patch chews up brushes quick!).
W&N S7s (left) and the throw-a-ways (right)
When it comes to layering and detail work, I stick with my good brushes, but if I’m throwing down the first layers – like the black undercoat and Boltgun base coat for metals – I can go to one of my workhorse brushes (as long as they still have a decent tip) to get the job done fast. And when I finally mutilate them past usefulness, I don’t have to feel bad about only needing to drop a couple bucks for replacements.