Although Warmachine MkII has brought positive changes to the Warmachine community, it unfortunately coincides with the closing of Game On!, a game store that has always been a strong supporter of the Warmachine community. On Wednesday the 14th, we had a last blast 35-point Mangled Metal MkII event – our first MkII event in St. Louis.
After throwing around a few possible casters, I decided on some of my lesser-used options to see how they changed in MkII. I was curious to see if they and their battlegroups would fit my playstyle better now, or if I would be able to change my playstyle to better suit their abilities. Read More “A First and a Last in St. Louis”
When I sat down with my Bastions the other day to prep them for painting, I decided to knock out Rhoven’s Honor Guard at the same time. It’s been a couple years since I painted any exemplar models and I remembered I hated painting their armor, but I forgot just how time consuming it was.
I’ve been asked a few times how long it takes me to paint a model. Most of the time I don’t keep track of how much time I spend on a given model – I usually don’t want to know how many hours of my life I’ve spent on this hobby.
Usually I listen to podcasts, music, or DVD’s while I paint, and the length of one of the podcast episodes I was listening to happened to correspond to a painting step that shed a pale sickly light on how long I had been at work on my exemplars.
First, a little setup. Painting exemplar armor is a fairly complex process because I prime in gray. I tried priming in white on my Knights Exemplar Errant, but the time I saved on the armor plates was quickly lost in the recesses of the model. From prime to finish, my process goes something like this:
Base coat the armor Reaper Master Series Yellowed Bone (usually multiple coats).
Two light coats of Applebarrel Goosefeather.
Wash the white areas with a thinned 2:1 mix of Goosefeather and Territorial Beige.
Blackline the edge of each plate where it has a border that will be metallic.
Base coat the metallic areas in GW Boltgun Metal.
Paint the metallic areas in a 1:1 mix of Vallejo Game Color Glorious Gold and Vallejo Game Color Polished Gold.
Highlight the metallic areas with Vallejo Game Color Polished Gold.
Was the metallic areas with a mix of P3 Armor Wash and GW Brown Ink.
Touch-ups & final highlights (plates and edges).
The time I spent on step 6 for all 5 Bastions and the Honor Guard pretty much corresponded with the running time of the podcast I was listening to: about 1 hour. That got my models to this point:
Exemplar WIPs
Unfortunately, I’ve been able to estimate roughly an hour per coat to get this point; so roughly 8 hours so far. And there’s still plenty left to do, including all of the purple areas after I finish cleaning up the metallics.
Aren’t you a little short for an Exemplar?
As a side note, I’ve found working on the Bastions and Honor Guard at the same time to be mildly humorous. As medium based models, the Bastions are far and away the largest models in the exemplar ranks of the Protectorate of Menoth, far huskier than any of their compatriots.
On the other hand Juviah Rhoven’s supposed Honor Guard are vertically challenged even by Knights Exemplar standards. Yet as pewter miniatures, the two Honor Guardmen weigh far more than the five Bastions.
On September 5th we held a 350-point 1-1-1-1 event at one of the local gaming stores. As the event approached, I didn’t think I’d be able to make it. When I wound up with the day free at the last minute I threw together some lists and headed up for some good ole’ fashion heretic burning.
G’daybloke at Lost Hemisphere has declared this week Repenter Week, so I decided to jump on the bandwagon. Other authors have been posting their own paintedversionsof theRepenter, so given it’s already Friday, that’s probably about all I can squeeze in before the end of the week. So let’s fire it up.
It’s been over half a year since I started my Protectorate of Menoth character warjacks. Working on them quickly degraded from fun to tedious but a couple weeks ago I finally forced myself to sit down and make some actual progress. I’ll finally have them – and Typhon – competed within the next couple days.
Fire of Salvation
First up is the Fire of Salvation. One of my biggest complaints of the Guardian warjack is the engraved metallic shoulder plates. When I saw the Fire of Salvation shared that design I was disappointed – I just don’t like the way it looks. I thought about greenstuffing over them and smoothing them out but decided against it at the last minute.
My other issue was with the fire that was sculpted on the top of the mace. I’m not a big fan of painted fire, so I got rid of it, but that left the mace looking like it was missing something. After digging through my bits box I decided that since the Fire was Kreoss’ jack I’d take a cue from that warcaster’s epic form. I found an old Temple Flameguard spear and clipped the head to attach to the top of the Fire’s mace, making it look like it was designed to share aesthetics with its master’s weapon.
I still need to do a little work on the Fire. On top of a little cleanup, his rivets and the Menofixes on his shoulder need painting. I also have to decide what to do with the “orbs” attached to his collar above his head. Then it’ll be time for sealing.
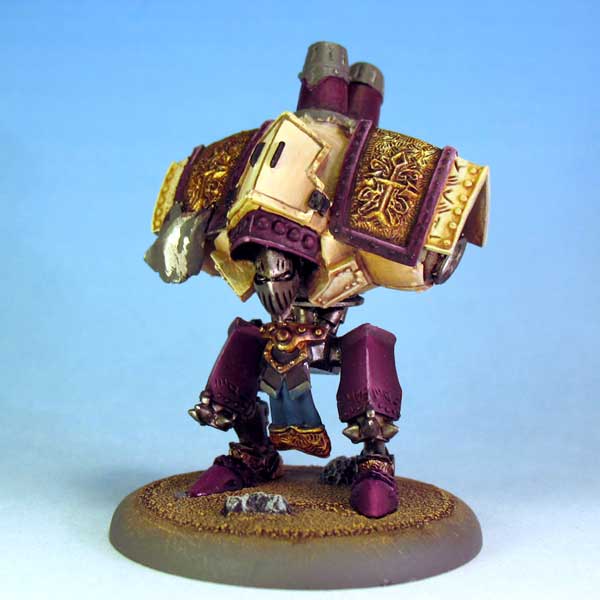
Blessing of Vengeance
I’ve also made a lot of progress on the Blessing of Vengeance, who is closer to completion than the Fire is. The only real change I made to Blessing was to leave off the banners which affix to the bolts on his shoulders. I’m not a big banner fan, so I tossed them in my bits box with the banners for my Seneschals, Avatar, Guardian, Harbinger, and Epic Kreoss. Sense any trends there?
I’m not completely happy with the posing on this model. His spear doesn’t hang below his base but I can see it potentially being obnoxious on the table. I’m not sure how much I can reposition it without breaking the small pistons that attach his wrist to his forearm though.
Last up is Typhon, who I took a little break from for a while. He’s mostly complete now but I’m not happy with him yet. His mouths just don’t look right and I’m contemplating repainting the stretched skin areas around the bone circle at his cheeks blue like his flesh as opposed to red like his gums.
Typhon
I’m looking into a new photography set up so I can get caught up on documenting my finished works, so hopefully I’ll have some better lit shots of these models soon.
After I finished Epic Thagrosh I took a bit of break from miniature painting. I’m not sure if it was the culmination of the burnout I had been feeling or the stomach virus I had caught but I pretty much put down the brush about a month or so ago. It wasn’t until just a couple nights ago that I finally sat back down with Typhon to try and get back into the swing of things.
Last time I worked on Typhon I had applied the initial wash to his skin but I hadn’t gotten any further. But when I sat down to try to smooth out the base coat, before I knew it I had flown through a majority of the layering and the clock was telling me it was an hour past when I should have gone to bed.
The following night I did some initial work on all of the carapace areas. I still have a lot of detailing and more highlighting to do on the skin though. The mouths also need a ton of work but overall things are progressing rapidly. Before long I should be able to seal and base this multi-headed monstrosity.
I haven’t decided what I’m going to paint after Typhon. Neither the Fire of Salvation nor the Blessing of Vengeance have been touched in nearly six months. I just haven’t been able to bring myself back to painting warjacks since then. Half of me really wants to get them finished and off my workbench but the other half remembers how un-fun jacks are to paint. Painting beasts is so much more fun.
Fire of Salvation and Blessing of Vengeance
I’m also considering switching to Rorsch & Brine. I basecoated Brine’s skin a while ago but he he’s virtually unstarted. Rorsch is just primed but if I paint him I’ll probably paint my Bone Grinders at the same time just to make sure that all of my Farrow have a consistently colored hide. There’s also a Stannis Brocker that has been in-progress for a while now that I wouldn’t mind working on either.
Stannis Brocker WIP
That’s just my models that are in progress, too. One of these days I should make a list of my unstarted models to try and prioritize them. Damn figmentia!
A while ago I mentioned that I was working on a pair of Protectorate warjacks – the Fire of Salvation and the Blessings of Vengeance. That was December 13th and I’m pretty sure that they’re in the same state now that they were then. The Fire of Salvation sat assembled on my painting desk for a month or two until the Blessing came out – I just didn’t feel motivated to put him together right away. After Blessing came out I figured it was time to get them both assembled and painted. I heard a lot of complaint about assembly of the Blessing but I honestly didn’t have much problem – it just required some dry fitting and pinning and it went together smoothly.
Fire of Salvation
I worked pretty hard on the models for about a month, making some pretty decent progress. I decided to use the models to test two new things. The first was trying a different base color for my off white areas. I really like the Applebarrel Goosefeather color that I normally use on my Protectorate stuff but that paint’s coverage is horrible. Normally I spend a lot of time putting down countless thinned layers of this color. This is a very time consuming process on a small model, let alone something as large as a heavy warjack.
This time around I gave Reaper Master Series Yellowed Bone a try. There’s a little more yellow in the color than normal but the coverage is superb. After laying down a base coat I did a single thinned coat of Goosefeater which helped re-tint the areas more to my liking. The end result was ever so slightly different from just using Goosefeather but was infinitely faster. Basecoat completed, it was on to shading as normal.
Blessings of Vengeance
And shading was my second experiment for these models. Once again I varied my recipe, mixing in some P3 Greatcoat Grey into my usual brown shading mix to add a little more depth to the shadows. The first results had a bad tint to them that wasn’t what I was looking for (nor did it match the rest of my army) but I glazed the shadows a couple times with my usual brown shading mix and that was all the fix that was necessary.
Once the experimentation was over it was on to the usual of jack painting – metallics, my royal purple, and other detailing. And it was at that point where my motivation started dwindling again. After trying to rekindle my efforts on these models, I realized my lack of motivation is due to the fact that I just don’t like painting warjacks. The only thing I can think of that it’s the big open spaces and the chassis that at this point are just so repetitive that working on them more of a chore than a joy. And painting shouldn’t be a chore.
Added to that the fact that I don’t even use too many jacks to often in Warmachine and I wind up preferring to work on something that will see more use like a solo, warcaster, even something from my Legion of Everblight army.
I really want to get these models finished but unless I decide to use them at Privateer Press weekend this year I’m not sure how quickly I’ll get back to them. I still have the scroll-work on Fire to do as well as the weapons (and some edge-work) on both jacks and they should be done.
Now if I can just get motivated to get back to work on them…
Smoke in the Skies, 500 pts.
Wednesday, September 19, 2007
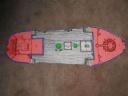
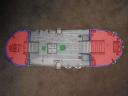
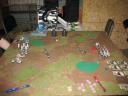
About five years ago or so I was starting an Earthdawn RPG campaign for a group of friends. I decided to start the campaign off with the published adventure titled Terror in the Skies which would feature some airships and expose the PCs to that quickly. One character was a Sky Raider so I felt it was appropriate, plus I had run the adventure before and was comfortable with it. The group like using miniatures for combat so I got a crazy idea. The adventure had deck plans for the two large galleons that were in the adventure and would inevitably wind up in a battle in the skies. So one day I scanned the two upper decks into photoshop, resized them to scale for 25mm miniatures, and printed them out. I then took the pages, glued them down to cardboard, and cut them out for use on the table top. The group loved them and they made the boarding actions really fun, but then the ships got tossed into the closet and remained unused until recently. After debating what scenario to play for a little while, Prorpger, Superduck, and I came up with the idea to use the cardboard ships to do a variation of the Smoke on the Water scenario from the campaign in the back of Escalation.
The rules of Smoke on the Water were pretty simple – two barges pass each other on the table. Each barge was its owner’s deployment zone and moving d6″ during its owner’s maintenance phase. Each barge can be damaged like a structure and is ARM 16. When either barge touches the opposite table edge, both barges immediately stop and whichever had sustained the most damage immediately sinks. Whoever holds the last barge wins. If a model was knocked off the barges, it was removed from play.
For Smoke in the Skies, we added a few rules based on the ships we were using.
The blue edging was deck railing, which provided cover and was effectively an obstacle. It also meant you could get slammed into the wall but not over the edge. However the main deck had weaker railing – no obstacle, and you could be slammed right through it. Basically it was all open ground.
The red areas were the raised decks and counted as higher ground.
You could cross between decks of equal height or from higher to lower, but not from lower to higher. So no going from main deck on one ship to the forecastle on the other.
The green locations were the ships masts that were impassable terrain, provided cover, etc.
Since the ships weren’t flat and weren’t going to line up perfectly, a model could cross the distance between the two ships as long as the distance between was less than 2″. They were either leaping across or swinging on rope or whatever swashbuckler imagery you wanted to apply there. Yes, jacks too. 🙂
With that we put together a couple forces to do battle.
Legion of Everblight vs. Protectorate of Menoth, 500 pts.
Wednesday, July 25, 2007
After I finished trying out a round of Infernal Contraption, Prorpger asked to play a game and actually commented that he wanted to try the Legion out. I was hesitant to let him borrow my models since obviously once a troll player experiences the awesomeness that is Everblight, they’ll never want to go back to their old faction. But what kind of a friend would I be if I didn’t give Prorpger more and more reasons to spend money.
I’ve gotten a little bit of painting done lately but not as much as I would have liked. I’m still making progress, though, and I have a few WIP pictures of my latest projects that I can post.
Exemplar Vengers
The biggest reason for how little I’ve actually gotten painted as of late is my Exemplar Vengers. I don’t even want to try to total up how many hours I’ve spent on these models up to this point, but I’m sure it’s no small number. The gold edging on the armor plates – present on both the mount and the rider – was probably the biggest time sink. Between a black base coat, a coat of silver, a couple coats of gold, and a blackline just inside the edging, I spent a few evenings on that alone. But all in all I’m happy with how the cavalry turned out and I’ve enjoyed fielding them.
Dervish WIP
My most recent work has been on my Dervish light warjack, pictured to the left. After as much time as I spent on the cavalry, this model was actually pretty quick to paint. I did the purple and tan in one evening, then the metallics in another. A third evening was spent basing and some general clean-up and now he’s just about done. I’m not exactly happy with the menofixes on the forearm plates yet, but once I get them how I like them I’ll be ready to seal this miniature and call it done.
Custom Base
I’ve also been doing a little work on a base for another miniature I’m assembling at the moment. I started by taking a cast of a Cryxian bonejack (sans head) and putting it on a base. After that I drilled some holes where the leg would be and added some wire and brass tubing to look like a broken leg joint system. Then I smoothed some greenstuff in a pool at the neck which I’ll paint up as necrosludge. I have some plans for this jack’s head, but you’ll have to wait for the finished product to see that.
Harbinger Skin Tone
Last night I finally started on my Harbinger of Menoth. I’ve had this model for some time now but have been hesitant to start painting and assembling as I wasn’t sure just what I wanted to do with her. Now that I’ve got that all settled in my mind, I assembled her torso (including the brass rod which replaces the flag pole) and started painting her flesh. Instead of using one of my standard flesh tones – I have a yellowy one and a more pink one – I decide to mix the two. I’m pretty happy with the results so far and am anxious to see how it looks once the rest of the miniature is painted.
Finally I had to do a repair job on my Gorman di Wulf miniature. I loaned it to another gamer to use in a game a few weeks ago and he dropped it, chipping the paint on the helmet and the cloak. I didn’t get a picture of it after the fix, since it really looks the same as it does in my miniature gallery.
So that’s what I’ve been working on lately. I’m going to be concentrating on the Harbinger in the near future and hope to have her done in the next week or so. I’ll be taking my time with her and hopefully she’ll turn out well.


 On September 5th we held a 350-point 1-1-1-1 event at one of the local gaming stores. As the event approached, I didn’t think I’d be able to make it. When I wound up with the day free at the last minute I threw together some lists and headed up for some good ole’ fashion heretic burning.
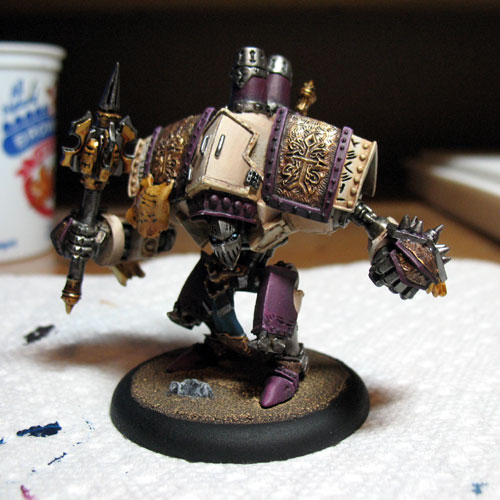


