Luke’s Legion Speed Painting Experiment

I’ve mentioned Luke here on this blog before. On top of being a fellow Legion of Everblight player he’s also one of the hosts of The Podge Cast, has guest hosted on the Iron Agenda, and is a former member of my weekly rpg group (and played in our Deadlands and Earthdawn games). Needless to say Luke’s a busy guy and that’s kept his budding Legion force unpainted.
I did a little research and found a few products and after picking them up, invited Luke over after work one day to hang out and test a possible method to speed paint his Legion beasts in the color scheme that he had implied he wanted to use. While the results aren’t anything that will win a painting competition the process was extremely fast and the results are more than sufficient for the table top.
The key to finding a way for Luke to paint his Legion quickly was to draw from two speed-painting sources – washing over white primer and what is referred to as “the dip method.” Now I’m not a big fan of the dip method as it’s traditionally used. Usually one would basecoat a miniature then dip it in a can of MinWax Polyshades and shake off all of the excess stain. The painter lacks subtle control over this method, it’s messy (as you shake the miniature), and the stain requires mineral spirits to clean up after.

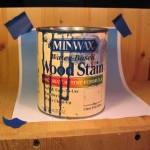
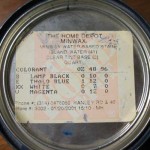
Then I found this at the ReStore, Habitat For Humanity’s discount surplus building material store. Yep, a can of water-soluble blue-tinted MinWax. Given the color that Luke wanted for his Legion, it was perfect. I dropped the massive sticker price of $1 for this 95% full can and asked Luke to bring some of his Shredders that had been primed white over for some testing.
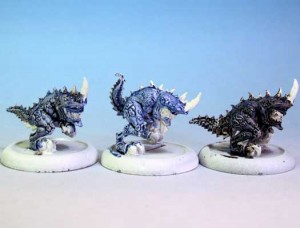
We tried three different methods for dragonspawn flesh over the white primer on Luke’s models. First was to paint the stain on with an old brush strait from the can. As expected the stain was drawn into the recesses of the models to shade them but also tinted all of the white areas enough to give the shredder the pale blue look Luke wanted.
I wanted to try to see if we could add just a little depth to the model so Luke stained a second shredder, then I washed it with P3 Armor Wash (a black paint wash) thinned 50/50 with water. The results were even better. The blue tinting still worked perfectly while the thinned Armor Wash darkened the deepest creases just that little bit more to really make everything pop.
Finally we decided to see if the reverse order would work – we washed Armor Wash over a freshly primed Shredder and then applied the Stain. The results were far less successful than we had experienced so far. The Armor Wash over the white primer turned it into a dark dark gray that didn’t take the stain nearly as well as the white did.
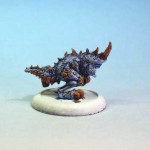
Luke and I both agreed that the second method (the left shredder in the picture) was by far the best. As quick as we finished the skin I went ahead and showed Luke the recipe I usually use for bone with a little tweak. While I usually use Delta Ceramcoat Goosefeather to basecoat bone I had recently been toying with using Reaper Master Series Yellowed Bone because of its superior coverage. Combining this my usual brown shading wash Luke was able to finish off the bone areas on one Shredder in about fifteen minutes. Given that this was Luke’s first experience with this recipe that’s quite an achievement.
Once Luke finishes the mouth and adds some basing this little guy will be complete. When it’s all said and done the entire process (sans basing) will be:
- Prime White
- Stain flesh
- Wash flesh with P3 Armor Wash thinned 50/50 with water
- Base coat bone Reaper Master Series Yellowed Bone (or P3 Jack Bone)
- Wash bone with a wash made from Delta Ceramcoat Brown Oxide & Delta Ceramcoat Dark Burnt Umber 50/50
- Clean up gums with white
- Wash gums with a dark pink to give them the right hue
- Pick out the teeth with white

With the proper assembly line set up I can see Luke cranking through his beasts… if he can just find the time! 🙂
