With just a couple days left before Privateer Press Weekend at DieCon X here in St. Louis, I’m still scrambling to finish a few last minute figures before Saturday’s Hardcore event. Surprise surprise, it’s down to the wire with me scrambling to finish a everything up in time. It really shouldn’t be a surprise, though. 🙂
I also have to clean up a few models and finish assembling my Exemplar Errant Seneschals in case I want to use them later in the weekend. They definitely won’t be painted for Hardcore but I might toss ’em in another list to give them a go in one of the other formats.
Despite being behind, I’m looking forward to the event. Last two years have been fantastic, and this year promises to be no exception.
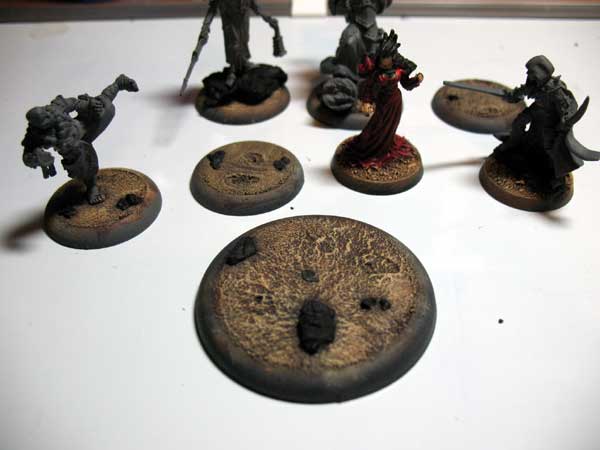
In a previous post I mentioned that I use concrete patch as a basing material. It’s an alternative to sand that’s a rock solid way to model dirt to-scale on a base. It requires a bit more effort than the traditional glue and sand but I think the end result is worth the extra work.
Base WIPs
The most difficult aspect of working with the concrete patch is that in order to attach models, you have to clip the pewter tab from the base of the figure, give it a quick filing, and pin it to the base. I’ve always preferred that method anyway, so it’s no big deal. But if you’re used to just gluing and slotting the figure, then switching to concrete patch is going to involve some extra steps.
Usually I’ll glue the pin to the miniature and drill a hole on the base, cover the base in concrete patch, and before it sets, press the miniature down where it’ll ultimately stand, and remove it. Once the concrete patch dries, the indentions left by the miniatures feet will cup them in place securely.
If you want add accessories to a base – things like small rocks, gears, or the like – the patch itself will hold them in place if you press them in before it dries. For the most part this has been all I’ll need to do, but occasionally if a piece is loose I’ll pop it up after the patch dries and glue it back down into the same divot, making it very secure. For tiny rocks made from cork I’ll just put a drop of glue over it while attached, and that is usually sufficient. I prefer superglue over craft glue for these steps.
As for painting my bases, I picked up a recipe for craft colors a few years ago that I use for all of my bases. I can’t remember the source anymore, but the combination works great. One note though, before going into painting – make sure you have an extra old brush. Drybrushing over concrete patch will ruin a brush like nothing else.I use craft paints for my bases because frankly there’s no point in wasting expensive model paints on them. Once they’re thinned slightly, they dry brush on adequately for any base and are far cheaper than higher quality alternatives. I purchased a set of 2oz. bottles of paints over two years go just for basing and I still have plenty left.
Basing Paint Range
The recipe is pretty basic. Just lay down a solid layer of Burnt Umber (or Dark Burnt Umber) and drybrush with successive layers of:
Brown Oxide
Autmn Brown
Golden Brown
Maple Sugar
If I feel I need a final layer of highlights, I’ll add a little Satin Cream to the Maple Sugar for just the lightest of dustings.
You could easily get away with buying less bottles of paint and mixing up midtones, but I don’t think it’s worth the time. Each bottle is less than $1 US, so for $5 you can buy enough shades to be able to work straight from the bottle – no wasting time mixing midtones or trying to match previous results.
After you paint the bare earth, you can add flocking and/or paint whatever additional accessories you’re adding to your base. It’s nothing fancy, but it gets the job done.
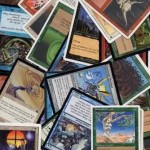
In the past, the only use I had for my small Magic: the Gathering card collection was as a character generation tool for role-playing games. I mentioned the process a couple years ago when talking about one of our campaigns, and the hosts of Fear the Boot, whom I game with talked about it in Episode 95 of their show.
But as I mentioned in my Backburst post, a few months ago my Saturday group and I started playing Magic to pass the time until everyone arrived for the weekly role-playing session. If you’re like me, you’ve heard of the $500 decks and the craziness that goes into playing in tournaments, but that’s not what we’re looking to do. With just our modest collections we’ve put together a few decks each, which has been enough to provide a great side game to play casually and socialize over.
It’s been somewhat surprising to see how much fun the group is having just playing casually. A few members were a little leery at first, but when no one tries to win through strength of wallet it’s a good time. Unlike our role-playing, where there’s a story going on at the table that banter could interrupt, Magic can be an even more social experience for us since we can talk over the game with no ill effect.
I’ve never been a big fan of GF9’s tokens, and Privateer Press’ don’t work for me either. Both companies’ designs have some shortcomings that caused me to stay away from their products. At first I used Youngwolf7’s tokens, but by the time I picked up the Legion of Everblight I had started making my own.
Samples, Pre- and Post-assembly
Now that the Forces of Warmachine: Protectorate of Menoth book has been released I finally sat down between applying coats of primer to some miniatures to put together some tokens for my Protectorate force. I still had my set from MkI but enough abilities were renamed for me to decide to redesign a new set instead of using Youngwolf7’s design.
I did a little editing to the graphic used on the Privateer Press gallery page to create the background for my tokens, and added some text layers to create what’s pictured above. I used .75″ cubes or .75″ faux scrabble tiles I picked up at the local craft store to give the tokens some width and heft. They can usually be found in the woodworking and scrapbooking departments respectively. Mosaic tiles are another option, but those are concave and/or have an irregular surface, making these better surfaces for gluing.
Since I started this post talking about the issues I have with the PP and GF9’s offerings, I suppose I should go into a little more detail on what I think makes good tokens.
The members of my Saturday gaming group are all adults with busy lives so it’s no surprise that most Saturdays at least one person winds up being late for our weekly session. Instead of starting our sessions early and having to catch people up, we’ve recently started breaking out some Magic decks and playing a few games to pass the time.
During one of our games a player mentioned that he thought a role-playing game set in a heavily Magic-inspired setting would be a lot of fun, but that playing beings like planeswalkers didn’t seem like it would work. He was surprised when I replied that not only did I think it would work fine, I had done it before.
I’m not about to usurp the Earthdawn game we have running – I enjoy it too much. But with the interested around the table it seems like it might be time to break out my Manaburst notes and look at making some revisions. I’ve already started getting ideas on how to improve over our first attempt.
It’s already that time of year again. In a few short weeks Privateer Press Weekend at DieCon X will be upon us. This year the event will feature another Hardcore event again – the first ever official one for Warmachine MkII. There’s not much time left, but I’m behind on getting prepared. This feels oddly familiar.
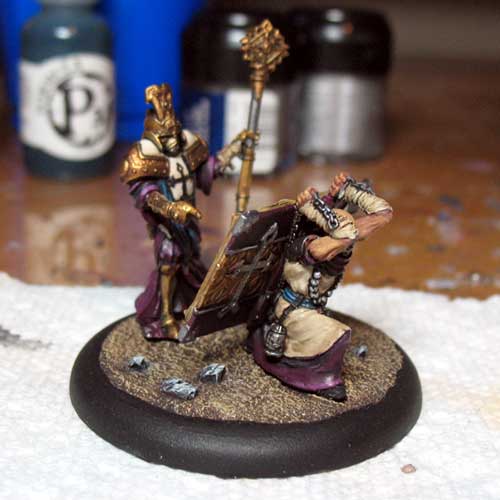
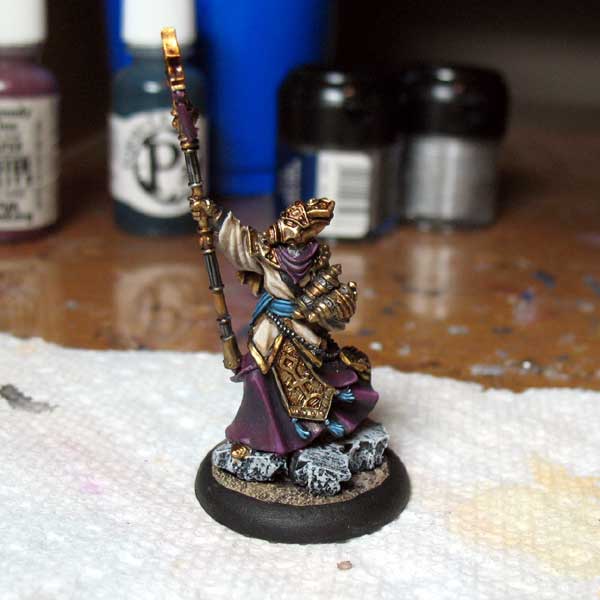
I have a few lists I’m tossing around to play, but I haven’t even really settled on if I’m playing the Protectorate or Legion. The Legion models I’d want to use are already painted, but there’s still a few key Protectorate ones – like the Hierophant and Covenant – that I needed to get to.
It’s been a while since I last picked up the brush; maybe even a couple months. Painting has always been an enjoyable hobby for me, but lately it’s always seemed like there’s something else I rather do with my free time. Still there aren’t many chances to play in a Hardcore event, so it’s time to buckle down and get to work.
The other night my Saturday gaming group took a night off from the polyhedrals to take a vaction in lovely downtown Mordheim. It had been a while since we hit the boardwalk for a wyrdstone-cream cone and a Sigmar’s Sizzling Sausage (don’t ask, but Chad’s obsessed with them). It was just like Coney Island, but with more rat-men, mutants, undead and witch burning and less fun and games.
Mordheim’s strength has always been the aspect of play where yoru warband gains experience and suffers injuries as you continue to play it. Unfortunately the customizability and organic warband evolution was tempered by a clunky system and obtuse rulebook. So we decided to give Coreheim a try.
Lately I’ve been neglecting my painting table – cheating on my models with a different craftform. I put down the pewter in exchange for styrofoam and traded in my paint for some spackle. With a little advice from Ulf of Dice-Speak and Game Fusion Studio, I’ve made an initial foray into the realm of terrain making.
A few initial attempts at hills (and Niska’s Skyplex on TV)
I’ve been painting models for years now but I hadn’t really spent any time on the terrain side of the hobby – there’s always been terrain to play on locally and I preferred painting models to fabricating scenery.
Sites like TerraGenesis have taught me the basics of terrain making but I didn’t have any real hands on experience. But over the course of a few nights with a hot wire foam cutter I put together some basic hills. Nothing major – and still in need of some greenery – but after I was happy with the results I decided to move up to something else I’ve been wanting to build for a while now.
I was expecting to see the Exemplar Errant UA in the new No Quarter, but not a new synergy solo for the unit. Granting Hunter to Errants, as well as having both Hunter and Pathfinder himself, really makes him feel like a Strider Deathstalker type model… but clad in white heavy armor?
Don’t get me wrong, I think this guy has some very nice rules that can be especially difficult for an opponent in scenario play. He can sit just out-of-sight behind/in forests and take pot shots, and since he can sacrifice Errants when he dies, stay in an area far longer than a single 5-wound solo would normally be able to.
RedBrick Limited‘s third edition of Earthdawn has been a big hit so far with my Saturday gaming group. The system is providing us with a solid internal consistency through which we can interact with the rich setting.
But like most groups, we’ve come up with a few tweaks to the system to make it better fit with what we want out of our game. The biggest is that we’ve decided to try a slight re-working to how strain is handled.
The concept of strain is that it is a key balancing feature to the game – there are a vast number of talents, skills, and maneuvers which include a strain cost to use them. The disconnect for many members of my group is that this is basically taking hit point damage any time they want to do something.

 In the past, the only use I had for my small
 The members of my Saturday gaming group are all adults with busy lives so it’s no surprise that most Saturdays at least one person winds up being late for our weekly session. Instead of starting our sessions early and having to catch people up, we’ve recently started breaking out some


